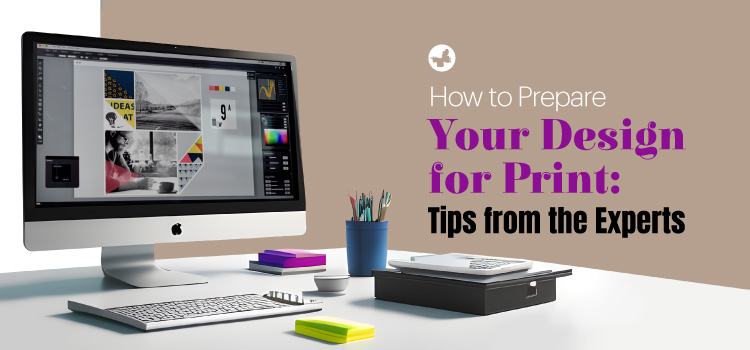
When preparing your design for printing, creating an exquisite layout is merely half the battle. The next and very important step is to comprehend how to convert that design from your computer screen to the physical world. You need to understand how to make a design suitable for print or formulate a print-ready design. There are various rules and tips to follow for the perfect final print products.
This process may seem overwhelming, but don’t worry; we’ve put together several professional tips to help you navigate this process. Let’s explore the most important steps you should take to prepare your design for printing.
Read More: How to Make the Most of Graphic Design Trends
Contents
Why Print Preparation Is Crucial
When converting a digital design into a physical print product, proper print preparation is essential to producing the best print design. This transition has a big impact on how your printed piece turns out in the end. The quality, coherence, and professionalism of your print are enhanced by a well-prepared design, also known as a print-ready file. You can reduce the possibility of mistakes, colour mismatches, and unforeseen problems when the final print is created by properly preparing your design for printing.
Important Steps to Prepare Your Design for Printing
To guarantee that your designs look fantastic and turn out precisely as you intended, there are a few crucial steps involved in getting them ready for printing. Here’s a quick instruction to help you prepare your design for printing:
The Fundamentals of Resolution and Colour
In the printing process, resolution and colour are two significant factors. Resolution refers to an image’s detail level, usually expressed in dots per inch (DPI). For a good print design, a high resolution of around 300 DPI is necessary to have a sharp and clean image. In the meantime, a lower resolution of around 72 DPI is typically used for web design.
The difference between how printers and computers interpret colours is crucial. Printers use the CMYK system (cyan, magenta, yellow, and key—meaning black). Your computer screen uses the RGB (Red, Green, Blue) system. Therefore, when your design is ready for printing, you need to modify your design colour scheme from RGB to CMYK.
Read More: How to Choose the Right Brand Colours
Consider Bleeds, Trim and Safe Zones
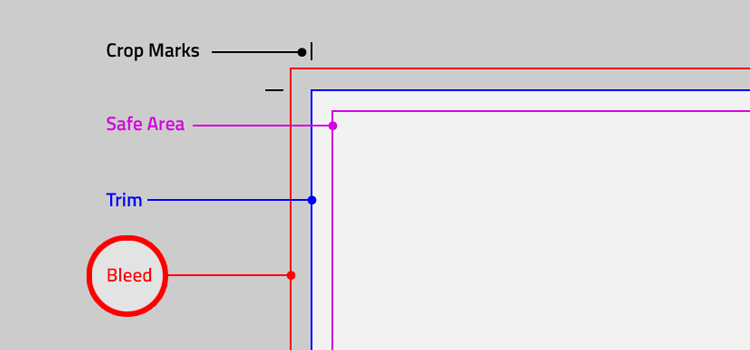
A crucial component of printing design is bleeds, which extend your design just a bit past the final trim size to avoid unsightly white edges after trimming. They are essential to guaranteeing that the finished printed material looks polished and professional. Not including it could result in undesired white edges, which would significantly detract from the overall look of your print.
Leaving about 0.125 inches of bleed space on all sides of your design is the industry standard. Although this section will be cut away during the cutting process, it is necessary to make sure that important parts of your design are not cut incorrectly. When figuring out the bleed area, ruler guides in your design tool or software come in handy and make the process easier!
Read more: Essential Print Design Terminology Explained
Attending to Fonts
When you are preparing a print-ready file, it’s essential to either embed your fonts or convert them into outlines. This step helps to preserve your design exactly as you intended, even if the printer does not support the font used in your design. Fonts that are embedded or outlined become part of the artwork, preventing them from changing during the printing process.
The importance of font size should not be underestimated. Your text might be hard to read if it is too small. If it’s too big, it could overpower the design and detract from its aesthetic appeal. As a result, choose your font size carefully to maintain design balance when printing. Remember to check the font spacing and make sure the kerning and tracking are correct for readability.
Use High-Quality Images
In printing, the image quality you use in your design for printing can significantly impact your project. Should your image quality be subpar, with flaws such as blurriness or pixelation, these defects will be noticeably amplified on paper. This can severely undermine your design’s appearance, making it seem unprofessional or sloppy.
Therefore, it is crucial to use high-resolution photos in your design file that contribute to a vibrant and clear print result. Because high-resolution images contain more pixels, they produce prints that are crisper, clearer, and retain quality even when magnified. Low-resolution photos, on the other hand, lack the essential detail and will appear hazy or distorted on paper, ruining the overall impact and the professional appeal of the design.
Employ Vector Graphics
Reprojected or regular images can sometimes turn blurry or grainy when altered in size, as they are formed from small squares, or pixels. Conversely, vector graphics do not carry this drawback. They use mathematical formulas to construct shapes, meaning they can be resized without a loss of quality. This characteristic makes them ideal for designs formatted for print. You can use Adobe Illustrator or CorelDRAW for this purpose.
Don’t Forget Proofreading
Verify that all of the text is free of spelling and grammar mistakes, and make sure that the design elements are positioned correctly. You can preview your work before it is ready for printing by creating a proof, or practice version, of your design. You have one last chance to find mistakes or make any necessary adjustments during proofs. By doing this, you can ensure that your design is perfect before printing in large quantities.
Read more: Print Proofing in Wholesale Printing: What It Is and Why It Matters
Select the Right Materials and Finishes
Choosing the correct material for your print product, also known as the substrate, significantly affects the final appearance of your print-ready design. The weight of the substrate, its texture (smooth or rough), and the finish (glossy or matte) can noticeably enhance your print design. However, these choices must not detract from your design but will definitely complement it. Picking the right material can take your print design to the next level!
Familiarize Yourself With Your Printer’s Specifications
Each printer has its unique features and specifications, and knowing these specifications can simplify the print process. Understanding the printer’s specifics can be achieved by visiting the printer’s website, speaking to a staff member, or contacting customer support. If your printer has any particular preferences or requirements for file formats, colour profiles, or bleed settings, you can ask them.
Gaining this knowledge can improve your printing experience and produce better results for your designs.
Read More: 5 Simple Steps to Preparing Your Files for Print
Conclusion
When you want to prepare your design for printing, you need patience, precision, and some experimentation. However, you will succeed if you follow the above-mentioned expert-recommended steps. While creating an outstanding design is the first step, your end goal should be to materialize that design in print, bringing your hard work to life. So, are you ready for printing? Share your creative design with ButterflyGP.com’s expert design and print team to guarantee excellent printing results! We are here to give you peace of mind regarding the printing process so you can focus on other marketing objectives. Good luck!