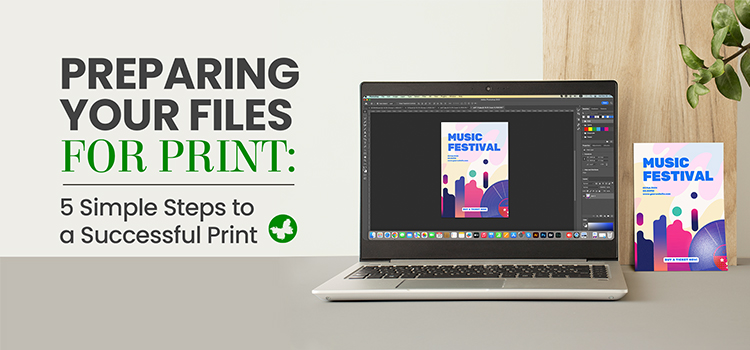
Printing is not just a technical process but also an artistic procedure. If you intend to order your required print products in bulk using a wholesale printing company, it is crucial to prepare adequately. Achieving excellent, polished results and preventing expensive printing errors depend on this vital procedure. It guarantees that your design is faithfully translated from digital to physical form, reducing the possibility of problems like misaligned elements, incorrect colour schemes, or unexpected white borders.
The goal of this blog article is to guide you through the steps involved in transforming your digital files into print-ready files that are ready for production. Preparing print files correctly will ensure you achieve your marketing goals successfully. Keep reading to strengthen your print process.
Contents
Understanding Print-Ready Files
Before we begin discussing the process of preparing print files, it is important to understand the term “print-ready.” A digital file that meets all specifications needed to generate prints of superior quality is said to be print-ready. In other words, it is the final version of the file that is ready for immediate printing without requiring any further adjustments. A print-ready file includes specific dimensions, resolution, colour schemes, and necessary bleeds and margins.
Read More: How to Prepare Your Design for Printing?
5 Steps to a Print-Ready File
When it comes to printing a design, there are several steps you need to take to ensure that the final product turns out well. These steps are important because they help eliminate any potential problems or complications that may arise during the printing process. By investing time in preparing your file properly, you can achieve a high-quality print that accurately reflects your original vision.
Here are five steps to follow to create a print-ready file:
Step 1: Start with the Right File Format: PDF, AI, or EPS

The initial step is selecting the appropriate file format. Two commonly used formats for printing are JPEG and PDF. JPEG delivers high-quality images and is a widely popular format. However, ensure you save your files at the highest quality setting to maintain image detail.
On the other hand, PDFs are the most popular choice and are often preferred by professional printers due to their convenience. PDFs retain all the necessary information for printing, including fonts and images, and can be opened on any device without compromising the integrity of your design.
Now that you have chosen the format and are ready to print the file, there are still a few more considerations to keep in mind.
Read More: Graphic Design Trends 2024
Step 2: Convert Your Colours to CMYK Before It’s Too Late
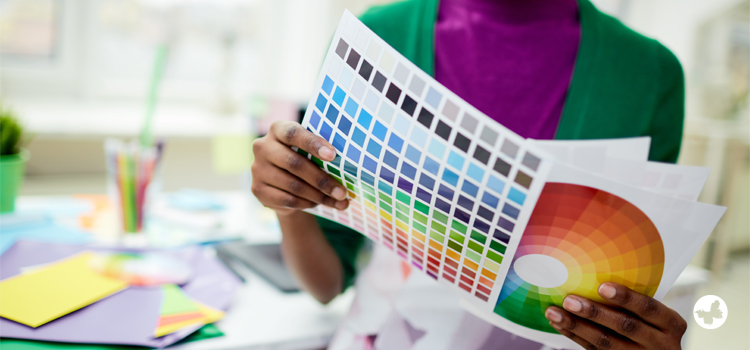
The colour scheme you choose for your printed materials significantly impacts their overall appearance. Most devices, such as cameras, scanners, and computer monitors, utilize the RGB (Red, Green, Blue) colour mode. However, professional printers typically work with the CMYK (Cyan, Magenta, Yellow, and Key-Black) colour mode.
Before proceeding with printing, it is essential to ensure that your file is in CMYK colour mode. If files are submitted in RGB, the colours may shift when converted to CMYK by the printer, resulting in the final product looking different from your original design. To avoid any colour discrepancies, it is advisable to verify the colour specifications with your printing company beforehand. In ButterflyGP’s case, we prefer CMYK.
Read More: How to Choose the Right Brand Colours?
Step 3: Use the Correct Resolution (300 DPI for Most Jobs)
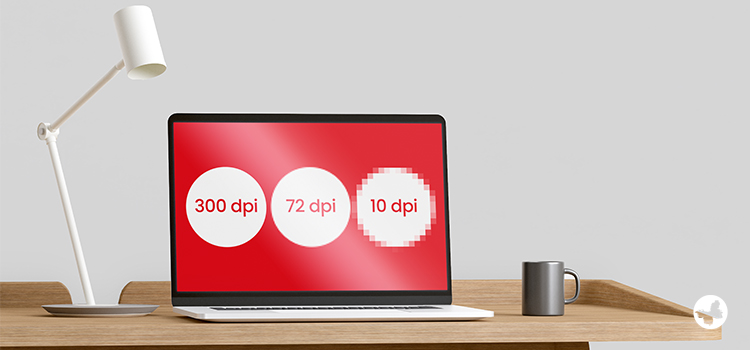
When dealing with large-format images, it is crucial to have a high resolution to avoid producing a blurry print. Resolution refers to the density of dots (pixels) within an image. The higher the resolution, the greater the level of detail in the printed image. Measure resolution in DPI (dots per inch) or PPI (pixels per inch). For optimal print quality, a minimum resolution of 300 DPI is suitable.
Additionally, it is important to accurately set up the dimensions of your file. Correctly specifying the dimensions ensures that your design will print at the desired size and aspect ratio, fitting perfectly onto your chosen medium. This step is essential to avoid any distortion or cropping of your design during the printing process.
Step 4: Don’t Forget Bleed, Trim, and Safe Zones
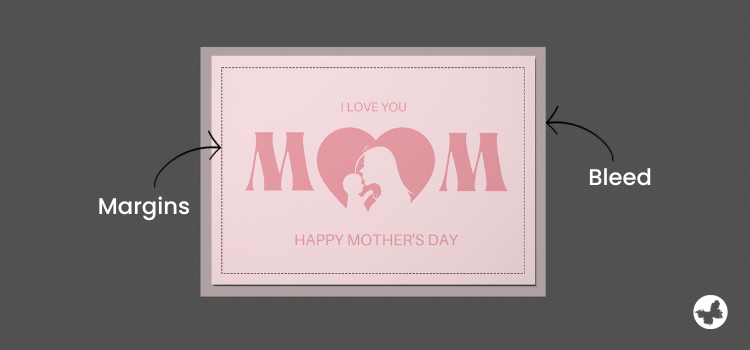
Bleed and margin are crucial components in print design that require special attention while preparing your file.
A bleed refers to the additional area that extends beyond the actual size of your design. The bleed area is trimmed off after printing to ensure that your design extends to the edge without leaving any white borders. Typically, a bleed of 0.125 inches is suitable on each side of your design.
Margins keep your text and important design elements away from the edge, preventing them from getting cut off after printing. A general guideline is to maintain a 0.25-inch safe margin from the edge of your design. This ensures your design elements stay within the printable area and avoid cropping during printing.
Read More: Essential Print Design Terminology: Safe Zone, Trim, and Bleed Lines Explained
Step 5: Embed Fonts and Outline Text
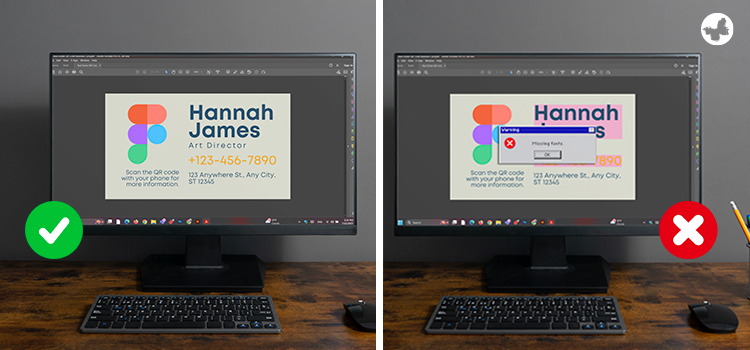
The final step in preparing your file for printing may seem simple, but it is one of the most critical stages. It involves double-checking your document for any spelling or grammatical errors, pixelation, and colour accuracy. Once your file goes into printing, any changes made will result in additional expenses in both time and money.
Viewing the file on several screens to check for colour consistency or printing a sample on your home printer are two easy ways to make sure your design is print-ready. To catch any overlooked mistakes, have a friend or coworker proofread your work from a different angle. All fonts and images should be embedded in your document, especially if you are sending PDF files. Embedding ensures correct display and prevents issues with missing fonts or images during printing.
Common Mistakes to Avoid in Print File Preparation
It is important to follow all the above steps for preparing print files successfully. To remind you not to make the following common mistakes, we are mentioning them:
- Ignoring high-resolution images: To prevent a pixelated or fuzzy appearance when printed, images should have a high resolution (usually 300 DPI). If you don’t consider this important issue, the final product will be hard to read and unprofessional.
- Not using the right fonts: To avoid font substitution, make sure all fonts are included in the PDF. Create a separate PDF file for each section if you’re worried that your printing partner might not have your special font.
- Inaccurate colour scheme: Print usually uses CMYK (cyan, magenta, yellow, and key (black)), but digital displays use RGB (red, green, and blue). By switching to CMYK, printing colours are guaranteed to be accurate. Otherwise, you may find the final prints totally different from what you designed on the digital file.
- Neglecting the safe zone: To prevent your important information from being cut off during trimming, important design elements should be positioned within the safe zone. Not considering this issue will result in a confusing design.
- Working with an unreliable print partner: Even if you take all the above precautions, your design, file preparation, and printing expenses will be ruined if you do not collaborate with a reliable print partner.
Conclusions
In conclusion, thorough reviews and understanding key aspects can simplify the whole process of preparing print files. Remember, the time and effort you put into preparing your files ensures accuracy and quality in the final print. So, embrace the process and enjoy the satisfaction of seeing your design come to life in print. ButterflyGP, with more than 2 decades of professional wholesale printing, is available to answer your print questions and ensure that your print process is satisfying. Start your order and consult with our qualified team to make sure of a premium final product.